I’ve recently attached a magnetic compass to the drone using the i2c bus. Let me start by saying that a good compass is not exactly cheap, I paid about 25€ for it and I’ve seen it being sold for over 100€ so it’s an expensive toy. Also, from what I’ve gathered, it’s really hard to find a good position for it on the drone seeing as all the motors have a strong magnetic field. Right now, my drone isn’t exactly flyable but I will share my experience with the additional sensor nonetheless, even though I have not found an ideal spot to place it at yet.
The compass chip I’ve attached is an HMC6352 (datasheet, link to breakout board supplier) by Honeywell mounted on a breakout board (very necessary if you are not a soldering pro). I’ve attached VCC and ground to the two pins carrying those current marked 10 and 11 in my previous post about the mainboard layout. The two i2c wires were attached to what I labeled C and D in said post. To be exact, I chose to attach the sensor to the i2c bus solder joints in the middle of the board, not next to the i2c eeprom; it was really easy to solder the cables on, no protective varnish of any kind. My warranty is probably void now, though. If you don’t want to risk voiding your warranty I suggest glueing something onto those pins also I can not imagine that being a really solid connection. In a worst case scenario it’s probably easiest if you swap the mainboard out for a replacement part and send the device in for warranty after that ;-)
The sensor is not attached to the same bus the firmware is using for the ground camera, an eeprom and another device I have yet to identify. I have not done excessive testing put I am able to poll the sensor while the firmware is operating so that seems to be a good sign. I slapped together a very small test program to retrieve the current heading from the sensor:
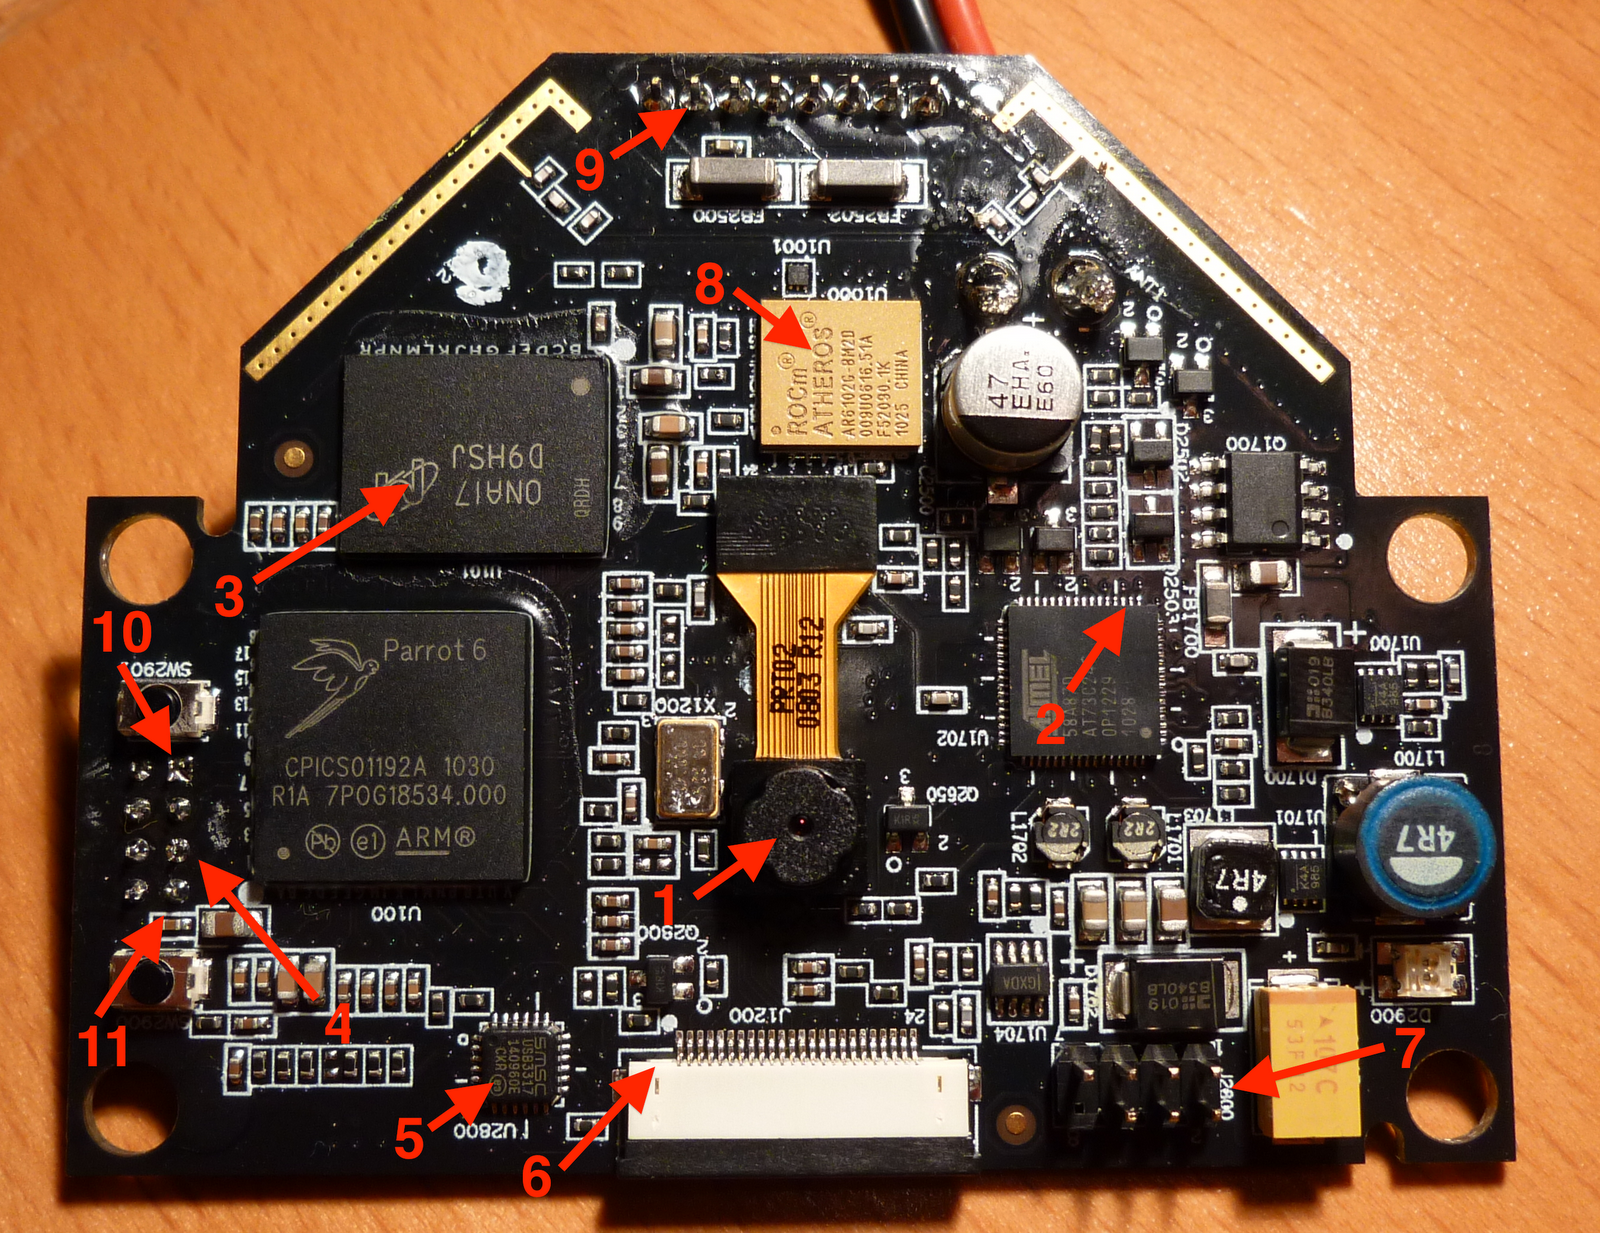
1: Camera, I2C bus 0 address 5d
2: I2C connectors for I2C Bus 0 arrive here
3: DRAM cache
4: Connector to navigation board, at least one serial port
5: USB driver SMSC USB3317
6: Connector to front camera, probably not an I2C device
7: External connection port with TTYS0 serial port and USB port
8: ROCm Atheros AR6102G-BM2D wireless
9: Power supply for the engines
10: Ground
11: VCC +5V
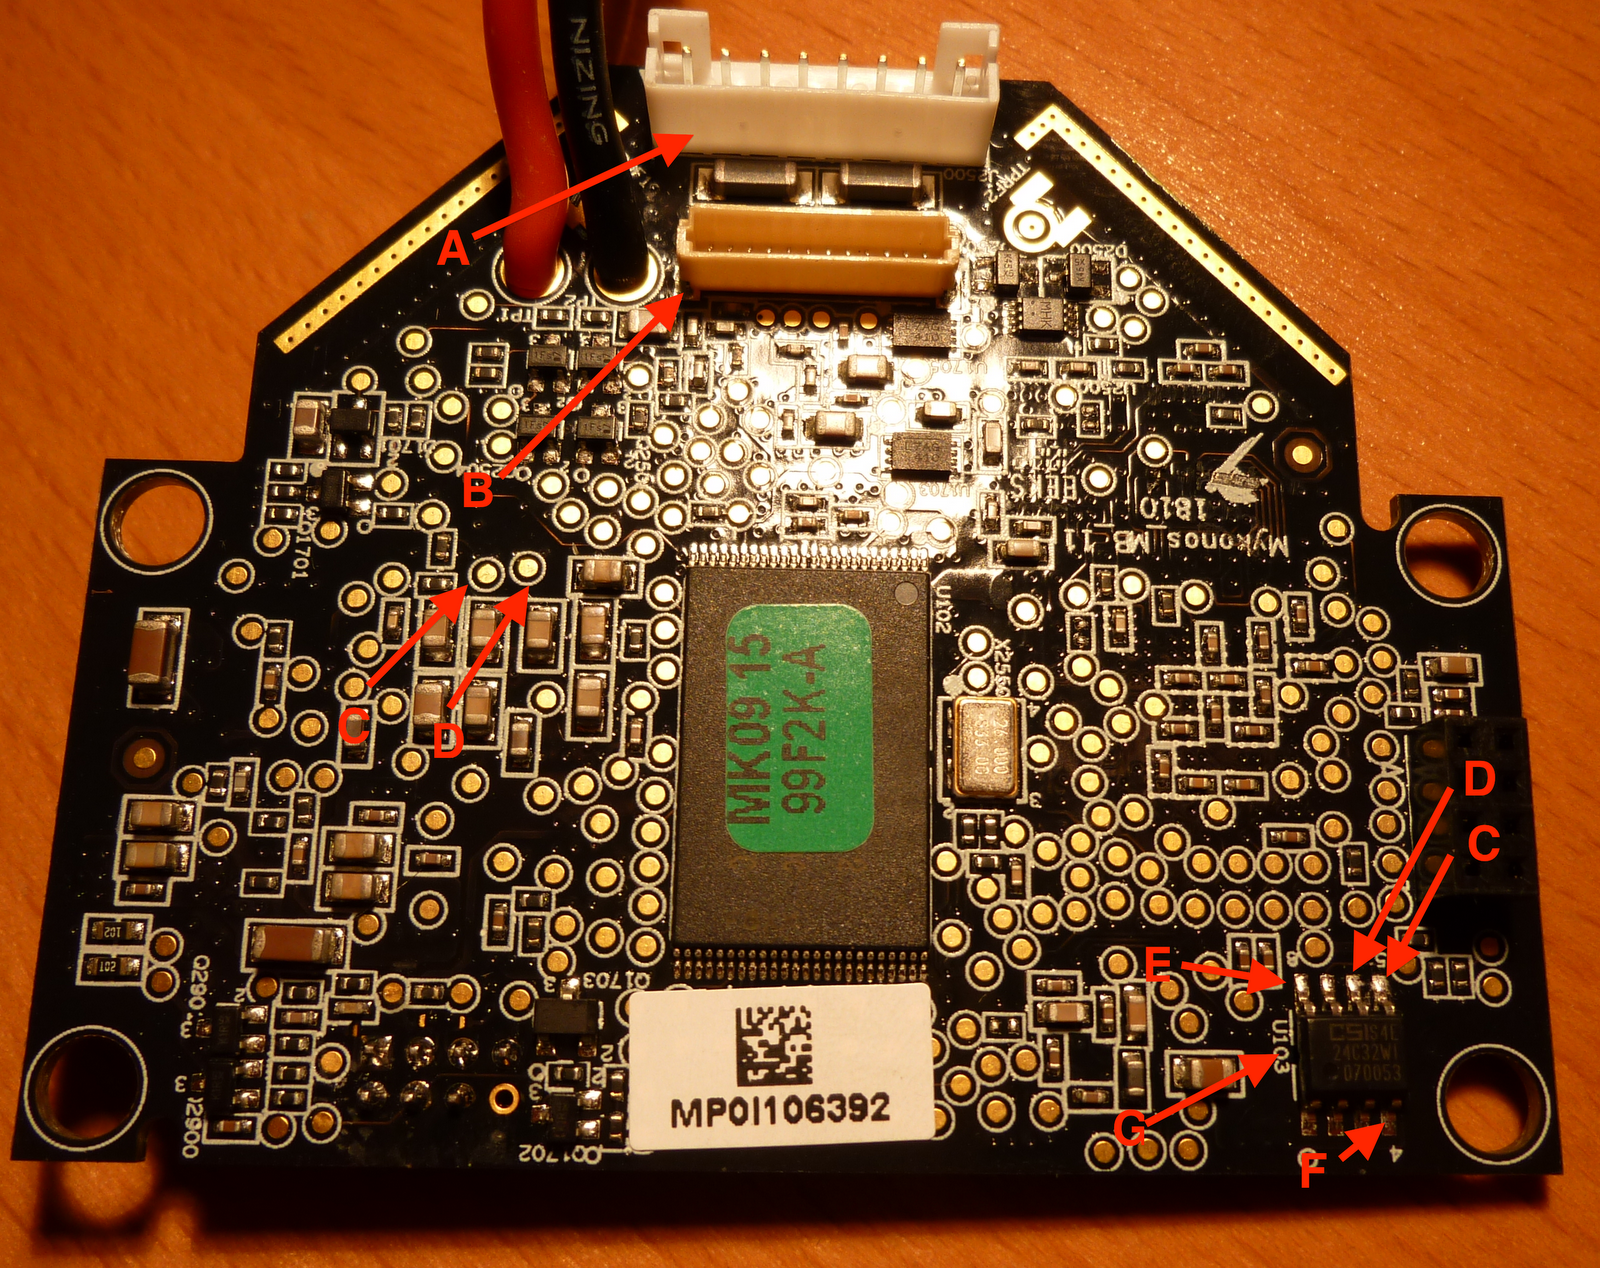
Bottom view
A: Power supply for the engines
B: Connector to the engine-boards
C: I2C Bus (data)
D: I2C Bus (clock)
E: 5V
F: Ground
G: I2C EEPROM CSI 24C32WI, i2c bus0, address 50
I will soon need a personal website including a list of publications, so I thought: Wouldn’t it be great if that was automatically generated from my BibTeX file? In cases like this, I always remember a great quote from Terence Parr:
Why spend 5 days coding something by hand that you could spend five years automating?
I agree, although I try not to loose myself in that kind of work. Anyway, the result can be found here!
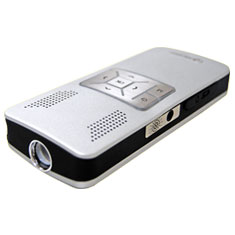
About two weeks ago I felt the need to try out the Aiptek V10 LED Micro Projector and it actually sucks a lot less than I thought. I am still thinking about selling it again but it was a nice thing to play with and it fulfilled its purpose.
What I found to be very problematic is encoding videos for the aiptek with my mac (same problem with linux or other unix-based systems I guess). There are a couple of pitfalls and it took me about 5 hours to figure every detail out so don’t waste as much time as I did and try what I came up with!
I used mencoder and ffmpeg to create working mp4 containers. Mencoder is able to add black bars to your movies; the aiptek will not play anything other than a movie which is exactly 640x480 in size, you can not just adjust the width to 640. I use ffmpeg after adjusting the video size to get a correct audio stream. I haven’t quite figured out why mencdoers ac3 doesn’t play on the v10 but a quick run of ffmpeg to adjust the audio stream works quite well and doesn’t take too long. All in all I came up with the following:
Software:
mencoder using macports (“sudo port install mplayer-devel +faac +x264 +xvid”)
ffmpeg using macports (“sudo port install ffmpeg”)
Commands used:
mencoder “$file” -sws 9 -of avi -ovc lavc -lavcopts \
vcodec=mpeg4:vbitrate=300 -o “$file-temp” \
-vf scale=640:-2,expand=640:480:0:0:1::,harddup -oac faac -faacopts br=64:object=2:mpeg=4 \
-srate 44100 -channels 2 -ofps 25 -ffourcc DIVX -noodml
The first command resizes the video stream and changes formats, the second run “fixes” audio. Now I am not sure why this is necessary but it works for me and it is resonably fast. You can also make a small script out of it: