Building your own more expensive Nest: Arduino, Android, React Native.
01 Jan 2019I recently bought a used Fiat 500e, naturally I set out to reverse engineer the CAN bus in it. That led me to discover Arduinos (which I knew existed but had never used) as well as ESP8266s. I had previously used FHEM to wire up my heater in Germany but it felt outdated even in 2011, much more so now so I decided to go for something prettier.
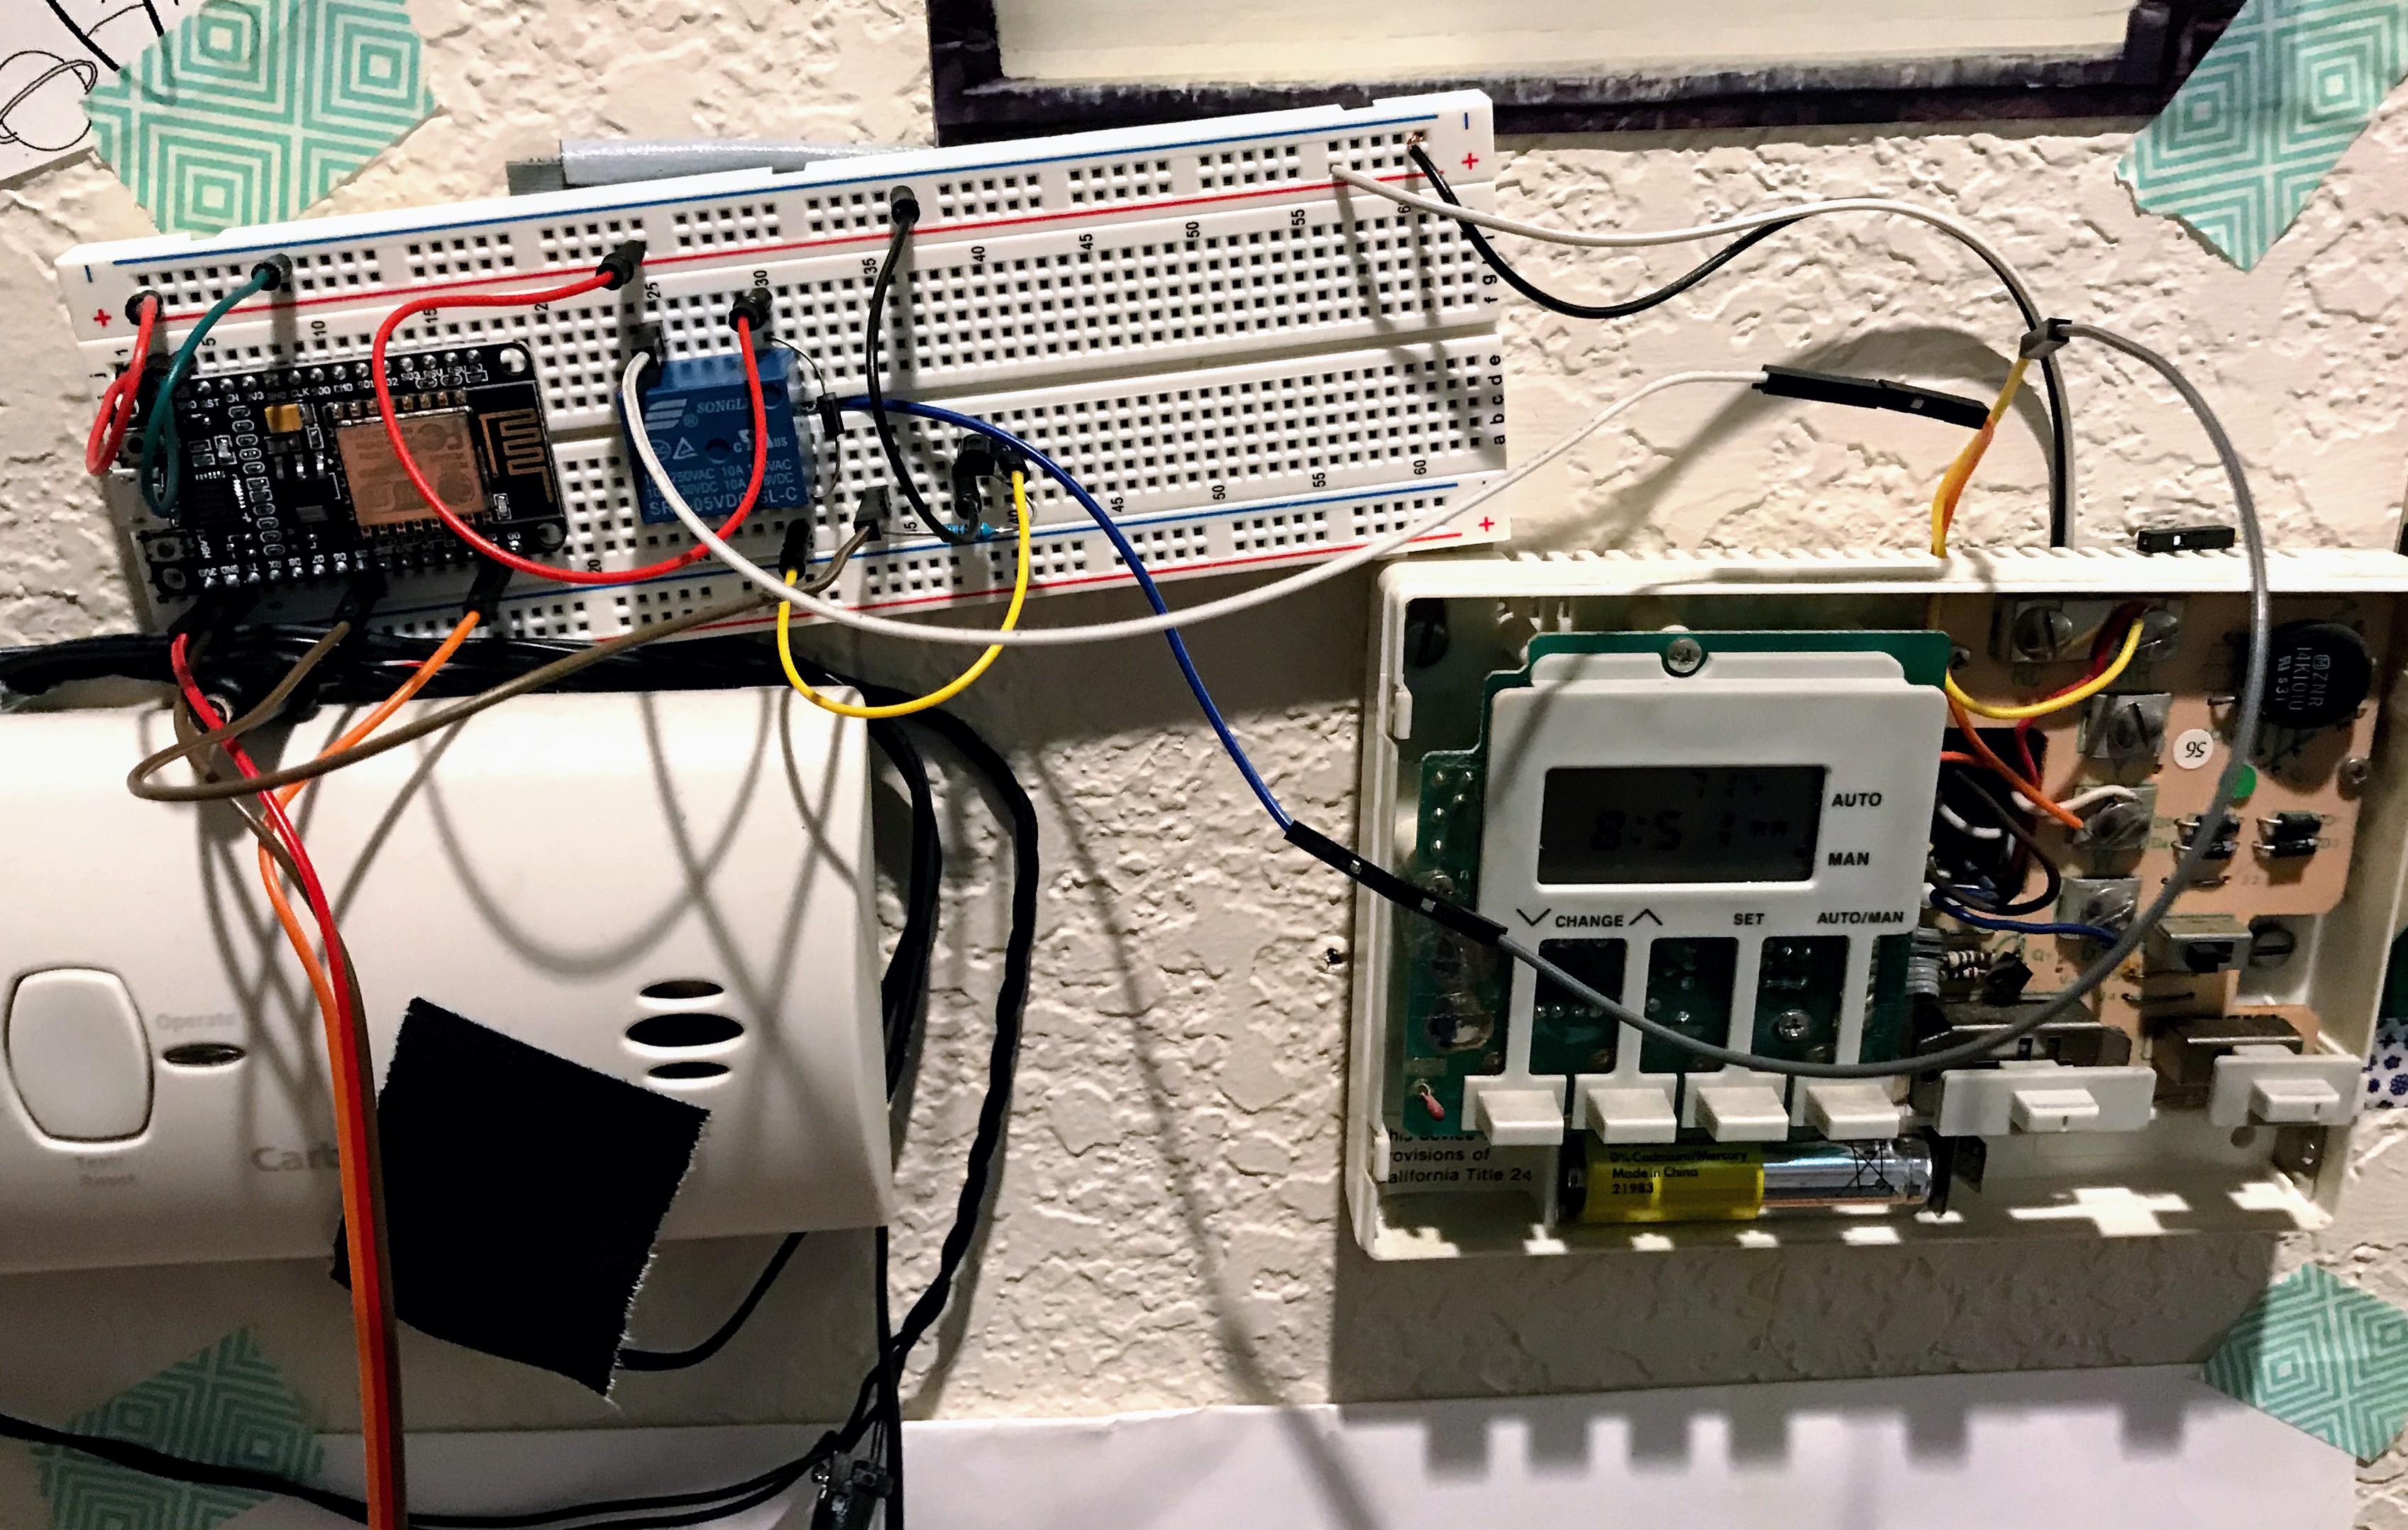
I first build a prototype on a breadboard that could connect to our wifi and control the heater. The Arduino acts as a temperature sensor as well as a way of switching our heater on. It however does not implement any control mechanism, instead it subscribes and publishes to an MQTT server and the actual control-loop is implemented using Node-RED. This seems beneficial as it is much easier to maintain software on a Linux machine than OTA updating an Arduino. Also, it allows leveraging cool plugins available in Node-RED.
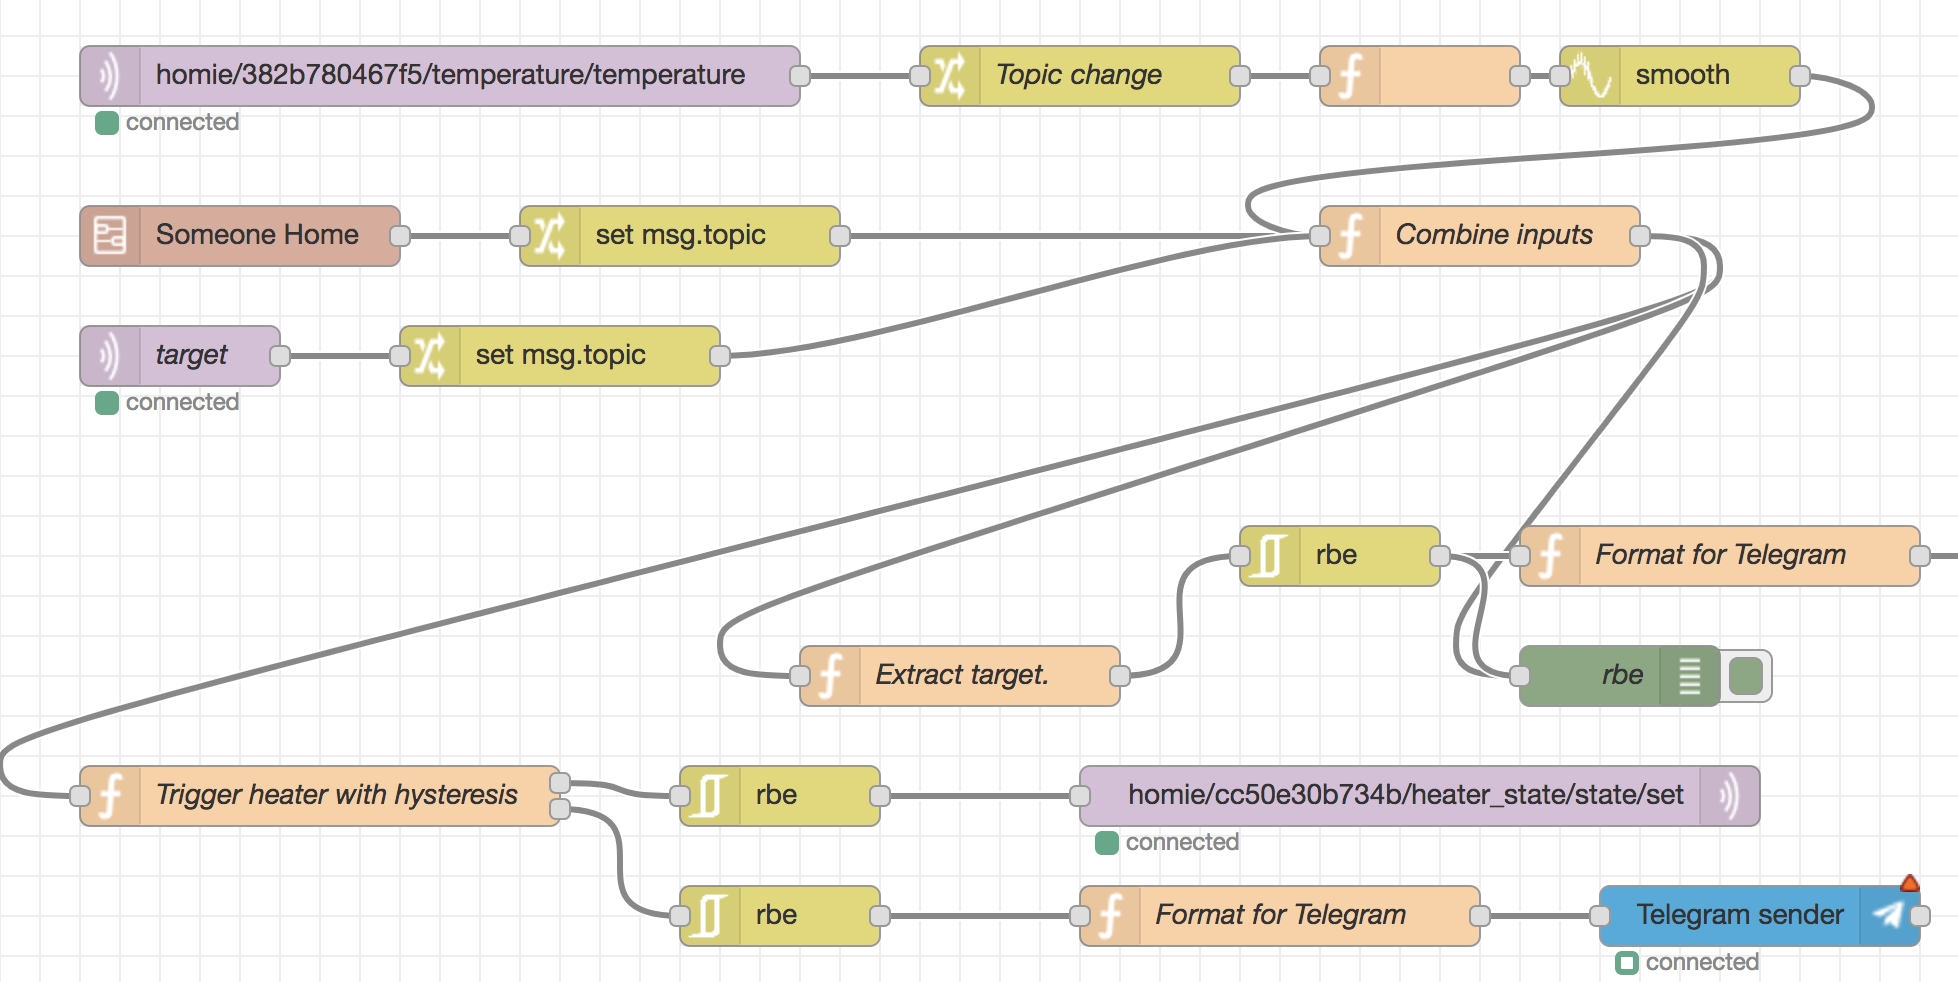
Node-RED, for instance, has a plugin to do PID control, a plugin for geofencing as well as a plugin for sending and receiving messages from Telegram. I’ve leveraged these to turn the heater off when no one is home and to allow controlling both our heater as well as smart outlets through telegram. This avoids having to go through random Cloud services operated by the creators of our smart plugs and instead allows keeping the connection local (and trust Telegram, but that’s only russian Facebook so that seems reasonable?).
The breadboard + Node-RED setup seemed nice enough, but I can’t exactly replace our very outdated looking heater controller with a breadboard and no buttons. At the end of the day, sometimes, it’s not my loving wife (who’s willing to control the heater with Telegram) who is here with me but maybe a visitor. Maybe we forgot a phone. It would sure be nice if there was an adequat way of controlling the heater from the wall as well.
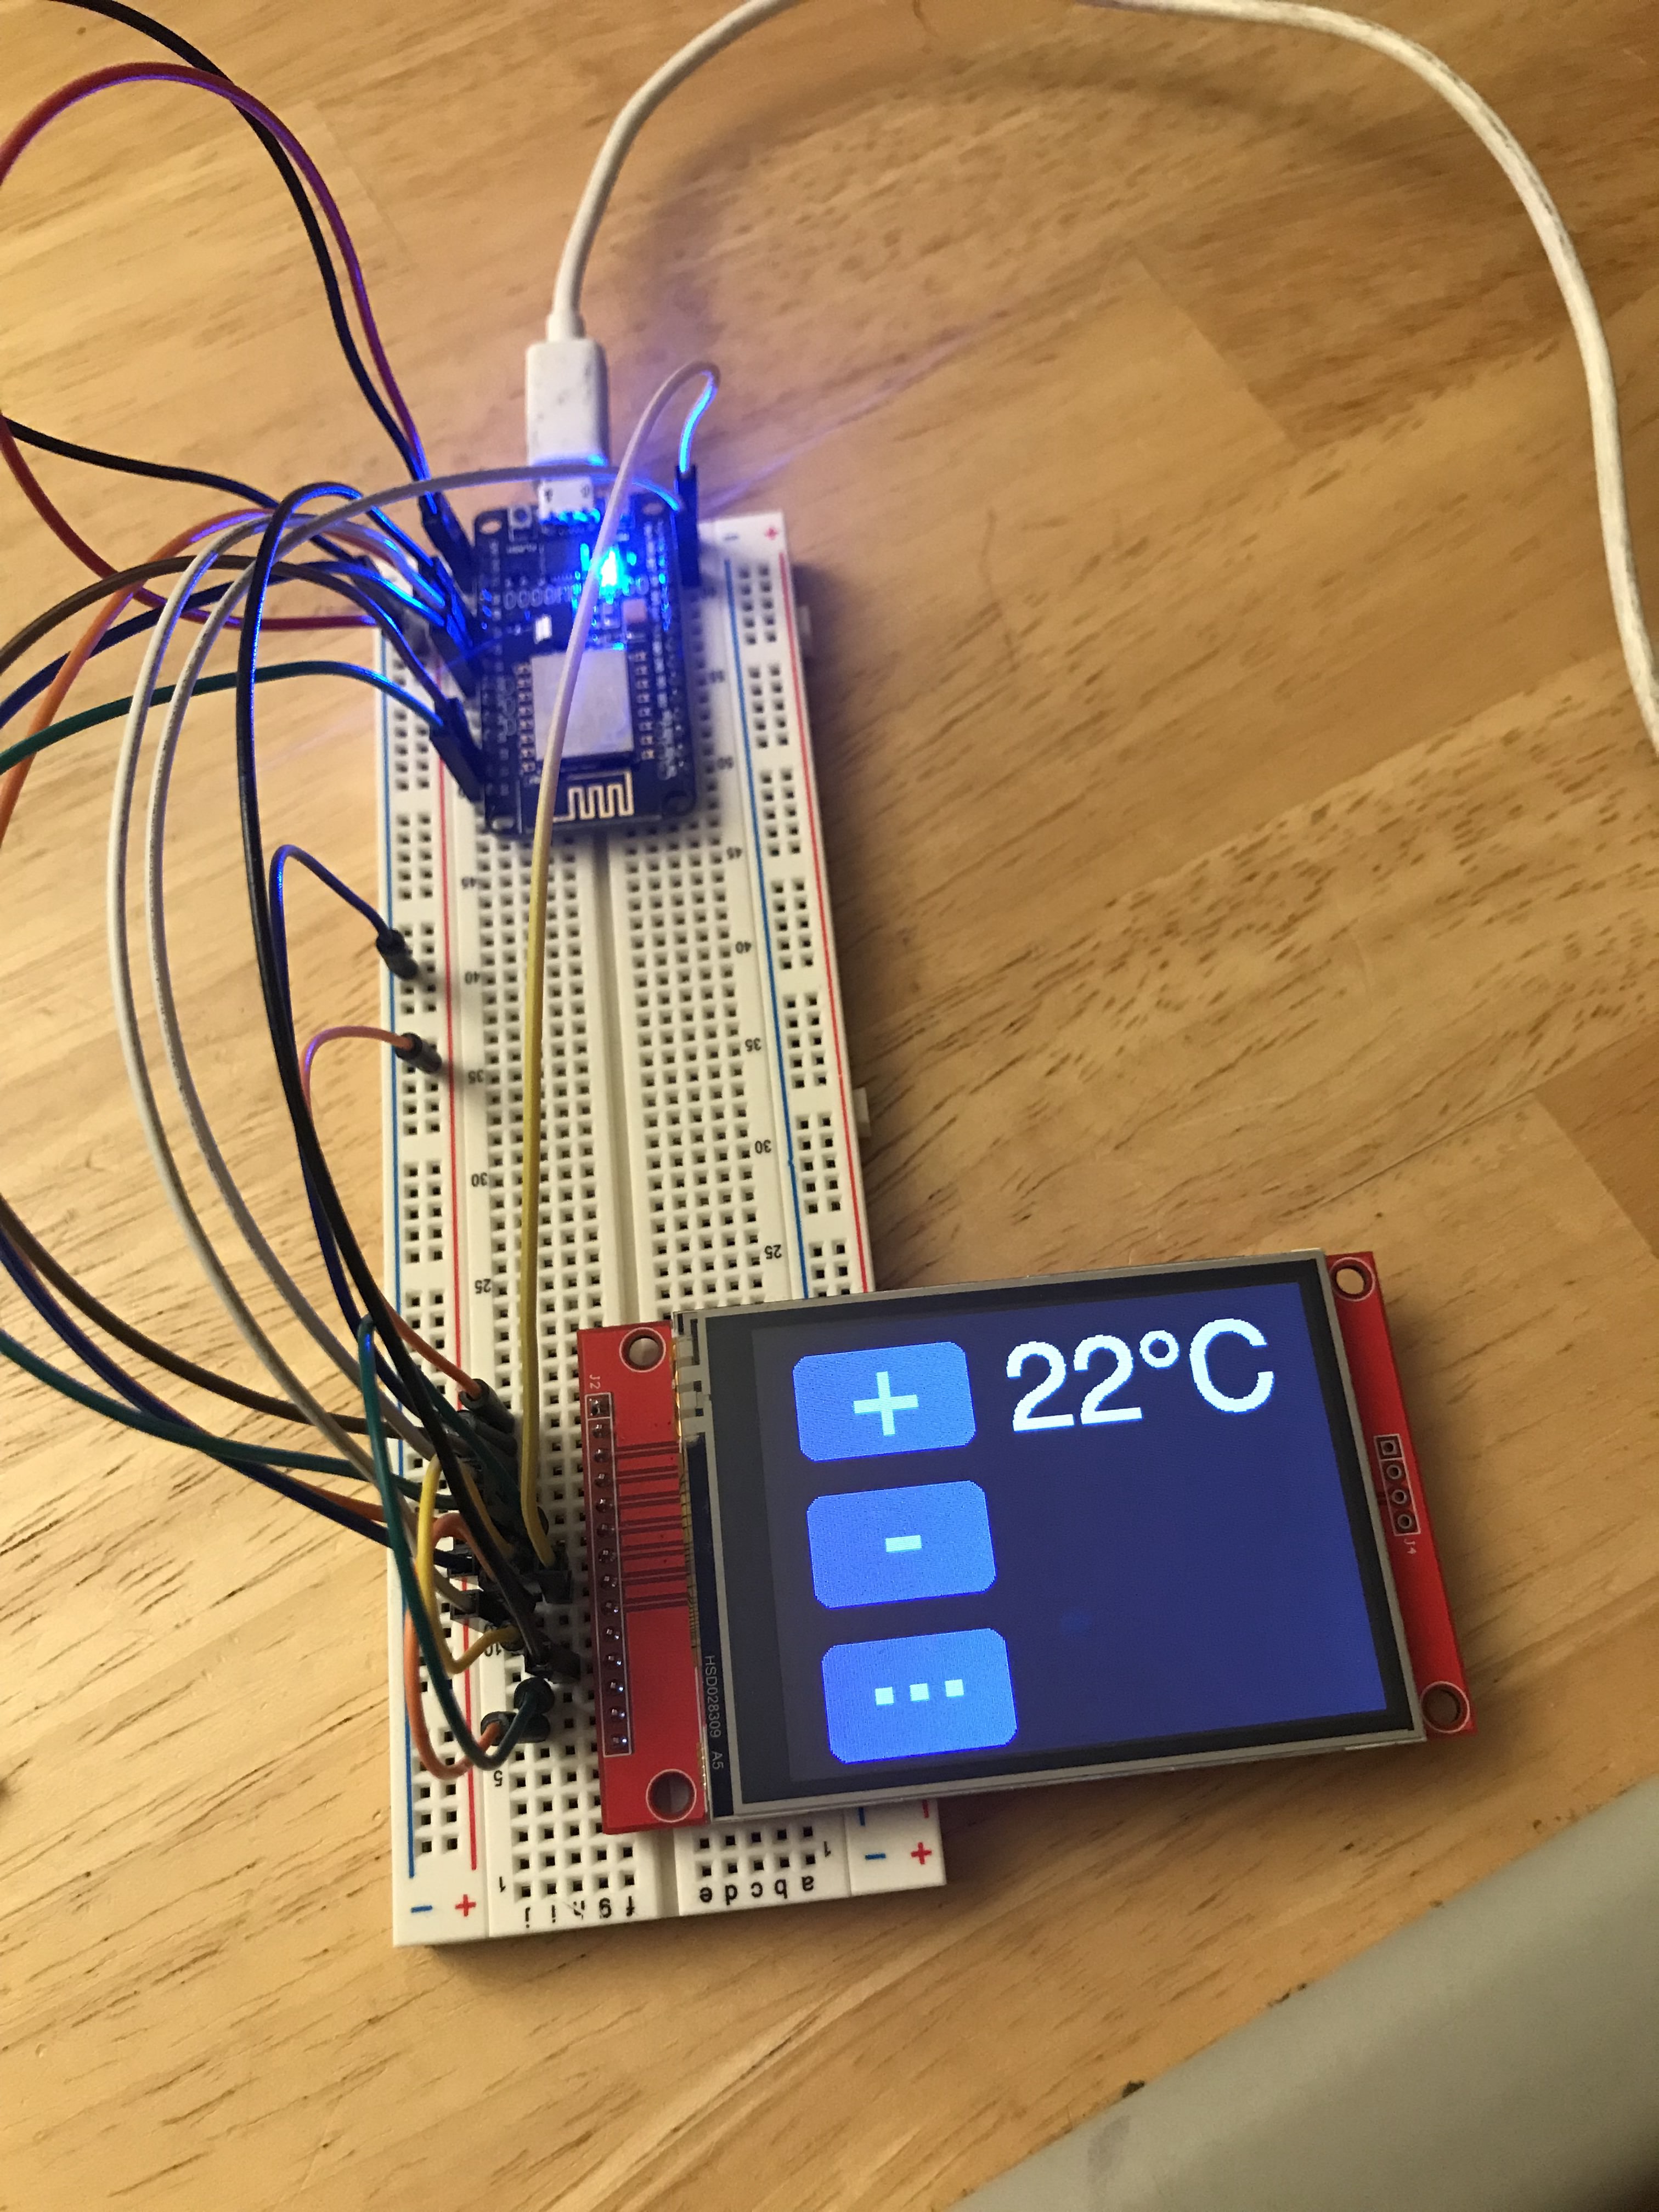
Since I had discovered Arduinos, everything looked like a nail now. So I soldered up a TFT display to another ESP8266 to build a touch screen interface for the heater.
Of course this looked a bit DIY so I decided I need an enclosure. Googling that, people usually 3d print those so I bought an Ender 3 3D printer, learned OpenSCAD and designed a bezel for the TFT. Then I realized that this is completely crazy: There’s already high quality TFTs with high quality software development frameworks bundled in a pretty package - Android tablets. So I pivoted!
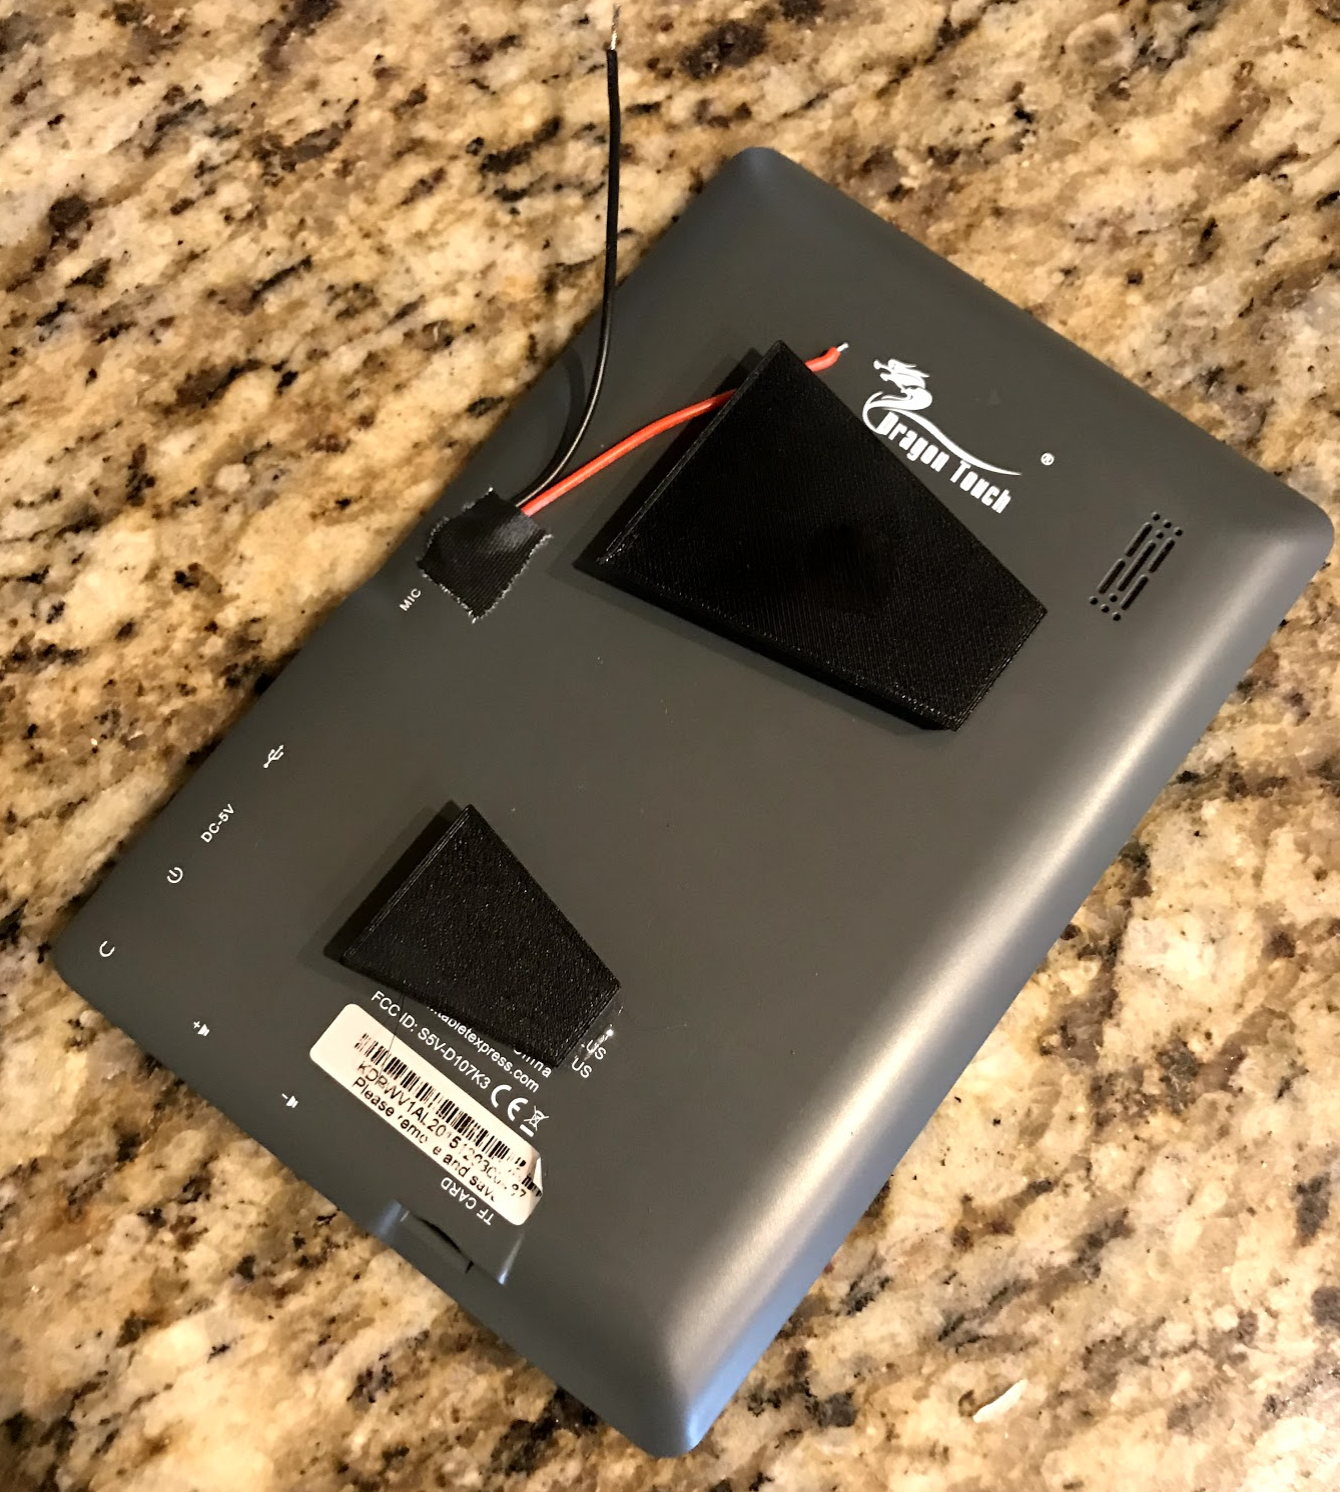
I had experimented with React Native on iOS once 2 years ago while baby-sitting my then-very-little daughter and it was a neat eperience, largely because I didn’t have to write any of the Apple languages. This time, I again gravitated to that, since I like react for frontends and already speak reasonable and modern JS. I hacked up a prototype, and put it on the tablet. Satisfied with the result, I started worrying about mounting the tablet on our wall. The 3D printer came in handy for that. For reasons I don’t fully understand yet, I couldn’t find any V-slot based mounts on Thingiverse so I designed one in OpenSCAD and then used it to make a wall holder that matches our old heater thermostat. The mating parts I epoxied to the tablet itself - the tablet sat in a drawer for 2 years and costs $37 new so it feels like any non invasive way of attaching the V-shaped pieces is overkill.
This is the tablet including the current state of the software, mounted to the wall:
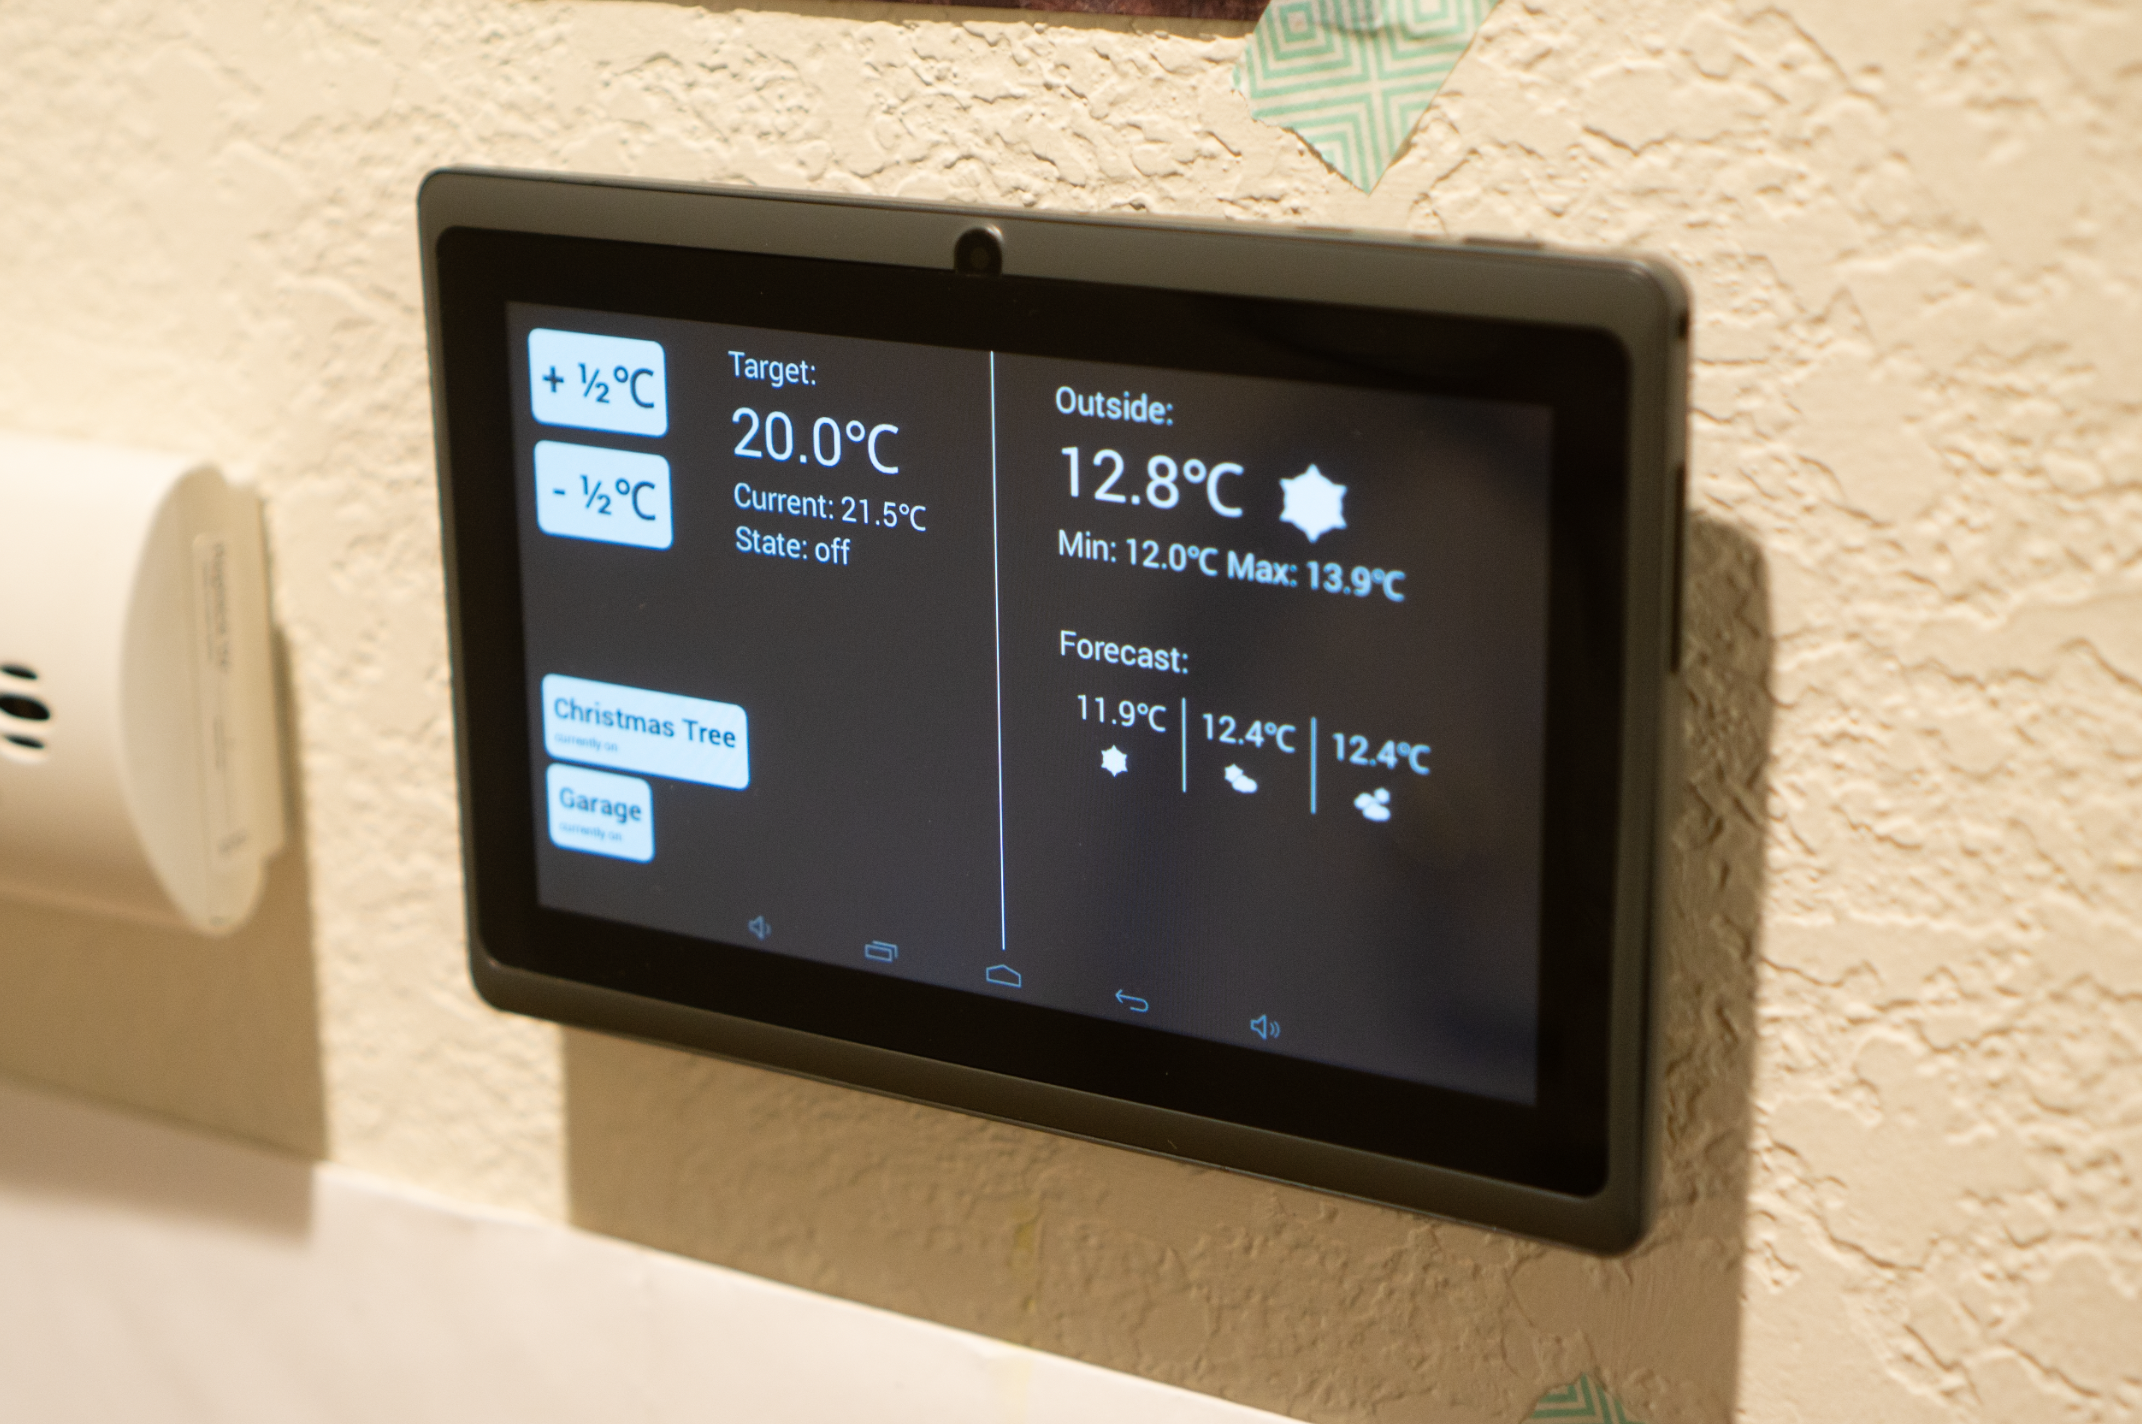
It also shows that I added a few smart-switches to the mix. They are reflashed Sonoff S31s which is a smart switch based on ESP8266 controllers. The key reason for using Sonoff switches is that I am not touching any 110V AC hardware because I really enjoy living.
The OpenSCAD-created 3D model of the mount looks like this (the Vs need to face so as to counter gravity though):
Glued-up tablet:
Was it worth it?
Negatives
- Inferior to any commerical solution.
- Cost:
- $300 3D printer and accessories,
- $200 Arduino stuff, and
- $40 tablet.
Positives
- Dabbled with
- React Native,
- ESP8266 and Arduinos in general,
- 3D Printers,
- OpenSCAD, and
- Electronics!
Overall this was quite worthwhile, not because of the awesome cheap product (it looks pretty slick though), but because of the amount I learned and tinkered with which I usually don’t.
If you’d like to know about any particular part of this, let me know.